Fingerprinted Food Dispenser
My Snacks, Not Yours

Overview
Are you tired of your roommate "accidentally" eating your snacks? Or maybe your boyfriend has a sixth sense for sniffing out your secret stash? Fear not, because now there's The Fingerprint Food Dispenser, the ultimate solution to snack theft and munchie manipulation.
Role
Product Designer
Type
Solo Project
Technologies
Arduino & Biometrics
How It Works
With the magic of Arduino and a fingerprint scanner, this dispenser ensures that only authorized users can access the snacks inside. When a registered fingerprint is scanned, the system activates a stepper motor to dispense food and then resets, preventing unauthorized access.
🔐 Fingerprint Authentication
The system continuously checks for a fingerprint and analyzes the data for a match against registered users.
⚙️ Motor Control
Based on the user ID, the stepper motor moves to dispense food and automatically resets to prevent unauthorized access.
🔴🟢 LED Feedback
Red and green LEDs provide instant visual feedback indicating access denial or approval.
🔄 Auto Reset
After dispensing, the system automatically resets position, ready for the next authenticated user.
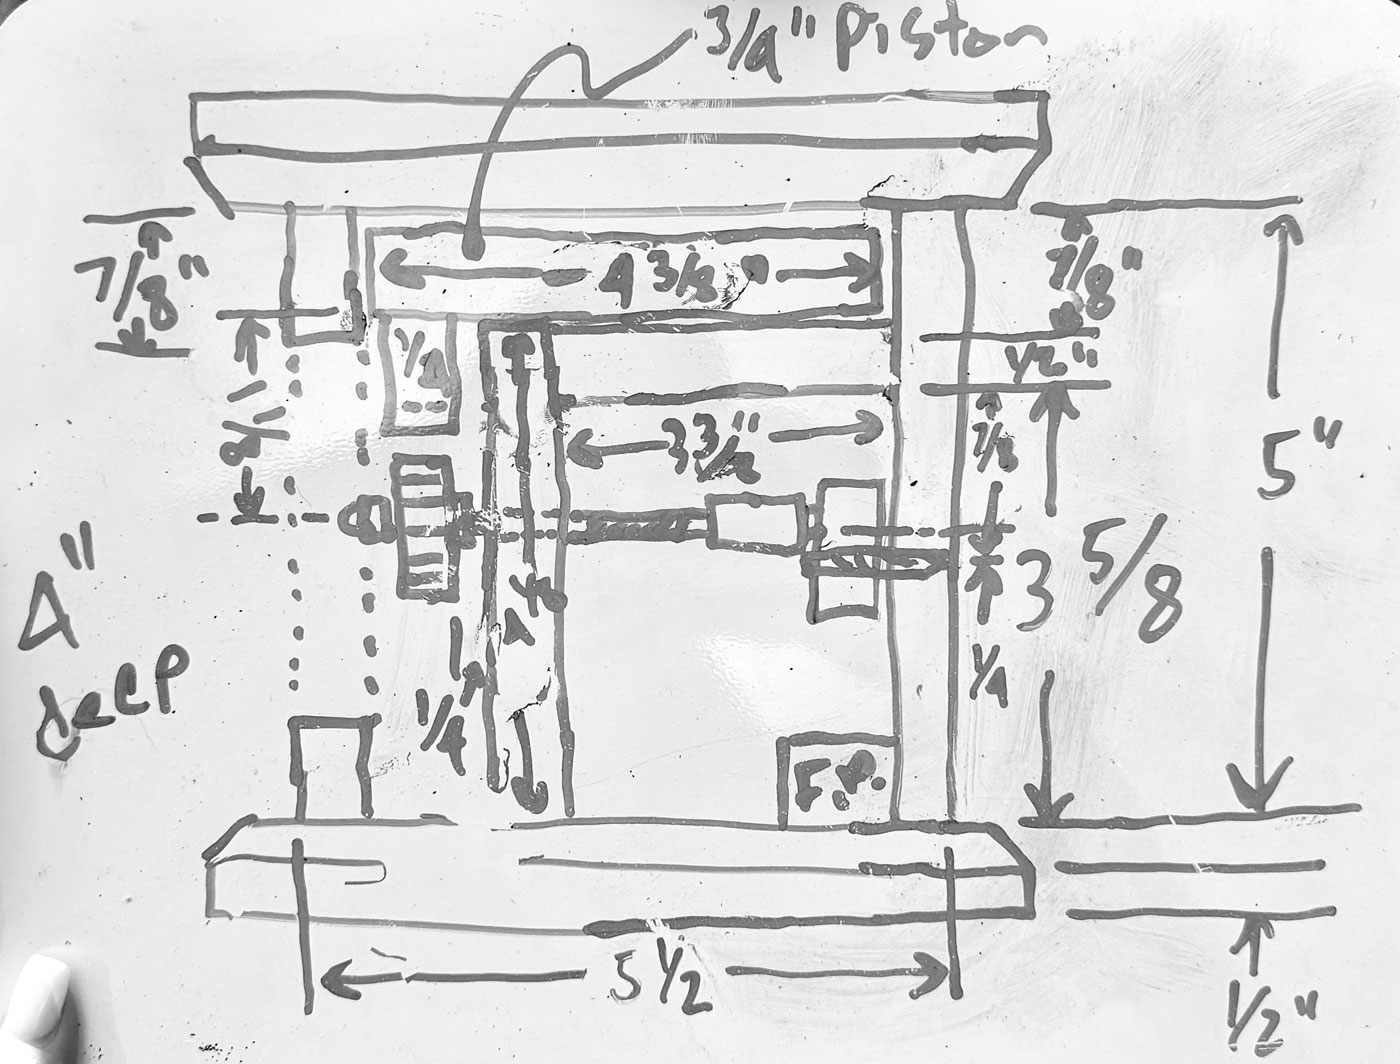
Design & Planning
The design phase took the longest. I needed to fit all components, electronics, motors, and mechanical parts, into a compact form without making the dispenser too bulky. I started by purchasing an existing dispenser and exploring different ways to create linear motion for food dispensing.
After experimenting with multiple ideas, I decided to use a gear and rack mechanism to convert rotational motion into linear motion. I ordered a pre-made gear and rack, then built a prototype to test the movement.
Design Plan
Building & Prototyping
Once the mechanical structure was set, it was time to integrate electronics. The fingerprint scanner was the heart of the system, if the "right" fingerprint was scanned, the motor would activate and dispense food. The first successful test was a huge milestone.
But getting the electronics to work alongside moving parts proved to be one of the biggest challenges. Aligning the stepper motor with the rack-and-gear system required precise calibration, and fine-tuning the fingerprint sensor's response took multiple iterations.
Prototype Demo
Overcoming Obstacles
Like any engineering project, this build came with its share of setbacks.
🧲 Magnet Failure
My original plan was to use magnets to hold everything together, but they weren't strong enough. I pivoted to using brackets instead, ensuring the structure was more stable.
🔩 Alignment Issues
I learned the importance of planning before drilling, some misaligned holes cost me time and material. If I had more time, I would refine the design to be even more seamless, with better structural integration.
⚡ Electronics Integration
Getting the electronics to work alongside moving parts proved challenging. Aligning the stepper motor with the rack-and-gear system required precise calibration.
Code Breakdown
The Arduino code handles the entire authentication and dispensing logic:
1. Fingerprint Reading
The system continuously checks for a fingerprint
2. Authentication
The fingerprint data is analyzed for a match
3. Motor Control
Based on the user ID, the stepper motor moves to dispense food
4. LED Feedback
Red and green LEDs indicate access denial or approval
if (finger.fingerID == 1) {
  Serial.println("clockwise");
  myStepper.step(stepsPerRevolution * 6.8); // Dispense snack
  delay(500);
  Serial.println("counterclockwise");
  myStepper.step(-stepsPerRevolution * 6.8); // Reset position
}
This loop ensures that the correct user ID triggers the dispenser and prevents unauthorized access.
Wire Schematic
This diagram visually represents the connections between the Arduino, fingerprint scanner, stepper motor, and LED indicators. It provides a clear understanding of how each component interacts in the system.

🎛️
Arduino Uno R3
Main Controller
👆
R307 Sensor
Fingerprint Scanner
⚙️
28BYJ-48
Stepper Motor
💡
ULN2003
Motor Driver
Pin Connections
Motor Control
- D8 → IN1 (Motor Driver)
- D9 → IN2 (Motor Driver)
- D10 → IN3 (Motor Driver)
- D11 → IN4 (Motor Driver)
Fingerprint Sensor
- D2 → Sensor RX
- D3 → Sensor TX
- 5V → Sensor VCC
- GND → Sensor GND
LED Indicators
- D12 → Green LED (Access Granted)
- D13 → Red LED (Access Denied)
Power
- 5V → Motor Driver VCC
- GND → Common Ground
- External 5V → Breadboard Power
Conclusion
The Fingerprint Food Dispenser combines security and automation to create a personalized snack experience. Whether protecting your secret stash or just adding a futuristic touch to your kitchen, this project showcases how biometrics and hardware integration can elevate everyday convenience.
Key Takeaways
- •Plan before drilling - misaligned holes cost time and material
- •Be ready to pivot - magnets failed, brackets succeeded
- •Test early and often - integrating electronics with mechanical parts requires iteration
- •Compact design is challenging - fitting all components requires careful spatial planning
This project was a challenging but rewarding experience. While there are areas I would improve, the process of problem-solving, prototyping, and overcoming obstacles made it an invaluable learning experience.
Explore More Projects
Check out some of my other work in UX design and product development.
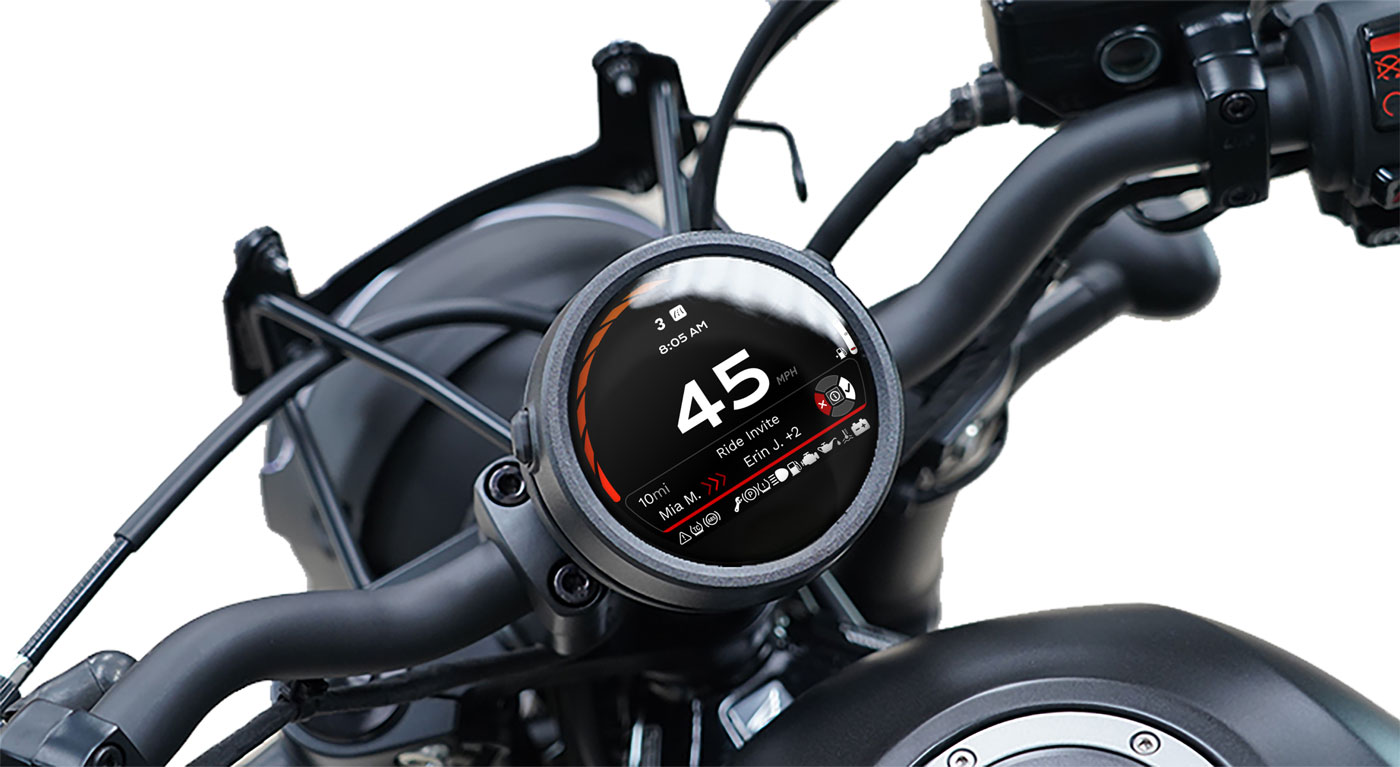
HondaConnect
A Social Compass for Motorcycles. Links a Honda HMI to a companion app through mesh technology so riders can connect, plan rides, and stay safe together.

Mo
Mirror Behavior. Create Self-Awareness. A social energy companion that stays quietly present and helps you see yourself a little more clearly.
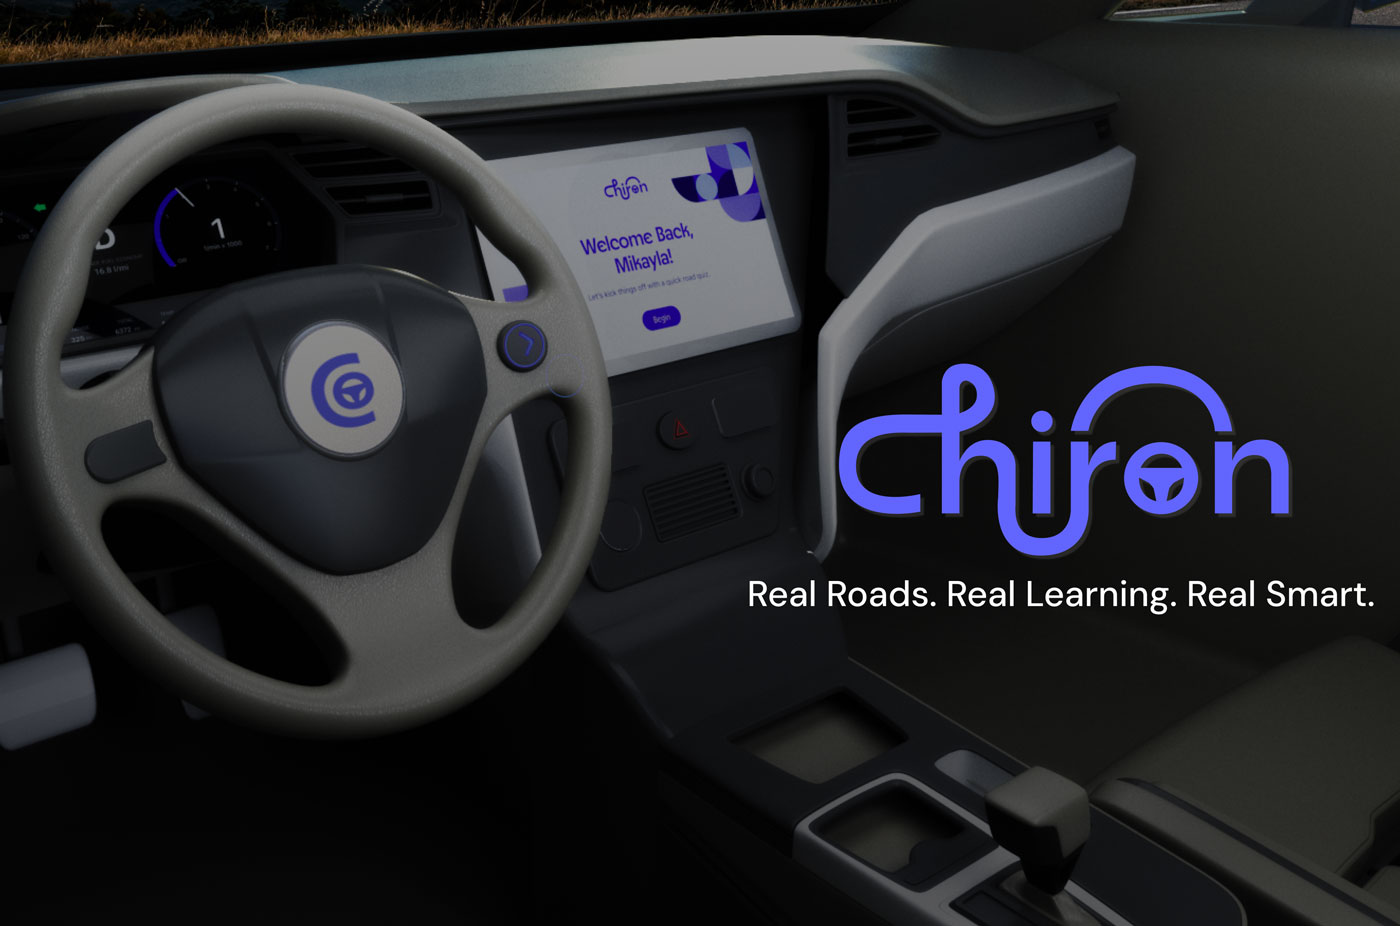
Chiron
Real Roads. Real Learning. Real Smart. An in-car AI system revolutionizing driver's education.